Super cheap grain mill
OK, in case you haven’t figured this out…I’m cheap. (Or frugal for you PC types). I look for the lowest cost way to do everything… and I think I managed to get milling grain to the lowest cost ever! How cheap? How about under $20?
It all started because of a thread on Homebrewtalk.com (if you don’t know this board you should check it out…it’s a very informative place to spend time) when someone wondered “aloud” about using a pasta maker as a mill. Someone else posted a picture of one that Micheals sells …and that was all it took to get me to get me to take a drive to the craft store and check them out. The price was $24.95…. until the wife told me she had a coupon for 40% off. Moments after that I was the proud owner of a pasta maker.
This is the one I bought and modified.

The first thing I did was give it a try of course. It wouldn’t pull a single grain through because the rollers are smooth and small. So I took that baby apart! I found a big coarse file and just beat the hell out of the rollers with the edge of the file. This would have been easier with a file that had teeth on the sides, but because the teeth were large there was a sharp edge that many tiring minutes later resulted in a nice “knurl”.
These are the rollers, in the first picture you can see one roller before the roughing up, and one after. The second shot is of both rollers done and reinstalled in the machine.


You can see that these have already done some milling!
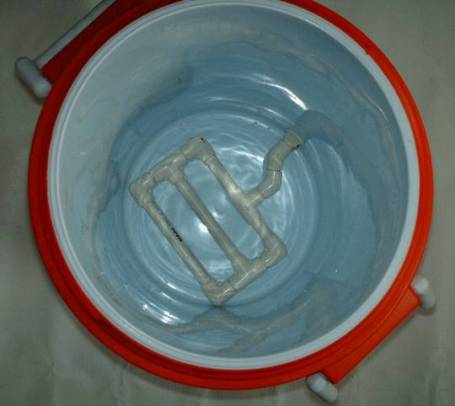
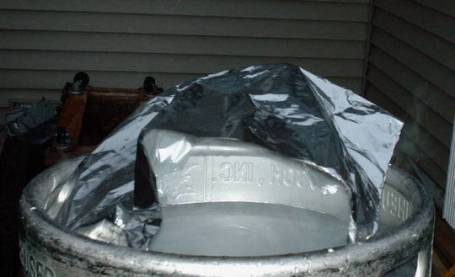
I first tried milling grains by using the supplied clamp and fastening it to the kitchen counter. Didn’t work at all! So I removed the base plate and made a board to mount the pasta maker-grain mill to.

That's a Homer bucket (from Home Depot) lid my board is sitting on.
Mounted to a bucket the pasta maker on a board now resembles a real grain mill! Especially with the high teck PET grain funnel.
 The small board that the 2 liter bottle is attached to is held to the mill with double sided tape. This works very well, but I should have taken some pains to close up the gap between the bottom of this board and the top of the sides of the machine. There’s a space about 1/8″ tall that malt was able to get out and bypass the rollers. I made a plug for this with some aluminum foil and tape, which worked fine.
Milling 7.25 pounds of grain with this is NOT fast! It’s downright slow…. and makes your arm pretty tired. I timed one of the bottles full and it tokk a full 9 minutes to empty it. I’m sure that powering the mill with a drill would speed things up, but I don’t really think the gears would take it long. Here’s the grain after it’s milled…
 I found it best to hold the whole thing down with my left hand…and for a while had an audience while I milled my grain….
 That’s about it for this entry… but I’ll close with a picture that I think is pretty cool…my doughed in grain!

Thanksgiving
Thanksgiving has been my favorite holiday for years… after all, when can you over eat at dinner, wait a few minutes and then eat all the pie you can cram in? But this one is going to be in the memory banks for a long long time!
My youngest son made it home for the first Thanksgiving dinner with us for 3 years, the last 2 t-days he was in Iraq, and I don’t remember where he was before that, but training I think. Anyway, to have him and his family here really made my day. His daughter ‘Bella being here meant that all 5 grandkids were in my house at one time…which I think was the first time that had ever happened. He,Jenny and ‘Bella will me leaving on Monday,headed for his new duty station in Maryland. Only 7 or 8 hours away…I think we’ll be making the trip fairly often.
Speaking of grandkids, it’s so fun to watch them grow and develop. They range in age from 3 and a half to 5 months,so there’s one in every stage of early development so it’s something new every time I see them.
The Snowy Mountain APA went over very well… it was by far the most popular beer yesterday with Corona being in second place. You can tell by the picture there was a lot of choice too. There was one bottle that died a tragic death… I hit the fridge door with my leg, knocking the shelf off and allowing several bottles to fall. One broke… a Honey Brown that I was hoping to try soon,and the only one I had.

Only question about yesterday…two of the people who drank beer had the runs all night… I have heard of yeast in homebrew causing that in some people,but I hope that wasn’t the cause here.
Ahhhh.. this might be too easy!
Sat down last evening with a mug of my Smoky Mountain APA. This was the 2nd or third time I’ve tried that, but the first time it was good enough to drink the whole thing. It’s been too flat and too green to be enjoyable enough to drink. However,last evening it had come around. Still needs more carbing/ageing, but now I think it will be good at Thanksgiving dinner.

Finally!
Twenty-two months after my kids gave me a kegging setup the keg finally has brew in it!

I can’t wait to see how this brew is carbed up. The sample when I took the final gravity reading tonight was just ok. I was shooting for a brew that wasn’t too bitter,after tasting the sample I’m notsure it’s bitter enough. I plan to leave it alone until at least Friday night when I’ll try getting some in to a glass. Hopefully it won’t be a glass of foam….
Back at it!
After the last couple of batches I brewed I just lost interest entirely. I had both batches in secondary fermentation,and just left them there. For more than two years! Never even looked at them.
Last month I sold my entire all grain setup,right down to the two carboys that held that last brew. I dumped them,cleaned the carboys and sold everything.
Now,a month later I have one 5 gallon batch in primary, and one in secondary.
I can’t even tell you why the desire came back. I honestly don’t know. I just decided that I wanted some homebrew on hand when my son gets here for his leave, and for our large family Thanksgiving celebration.
The batch that is in secondary is an extract with grains brew called Snowy Mountain American Pale Ale. Here’s an idea for a label if I bottle it.

The batch in primary is a partial mash.It’s a recipe I worked up in The Beer Recipator. It has British 2row, flaked maize and flaked rye. It should be about 5% abv,and about 25 ibu I think. It’s supposed to be pretty light colored. My goal was a dryer, brighter beer that might appeal to the people in the family who don’t get in to the whole homebrew thing.
Next up is a small all grain batch using ingredients I have on hand already. It’ll be a total experiment…I’m doing it with only 2 row grain and a single hop. I want it to be light and clean, with low bitterness and not complex at all. This one is again hoped to appeal to the lighter beer drinkers in the family.
I’ll be posting again soon….
Almost beer….
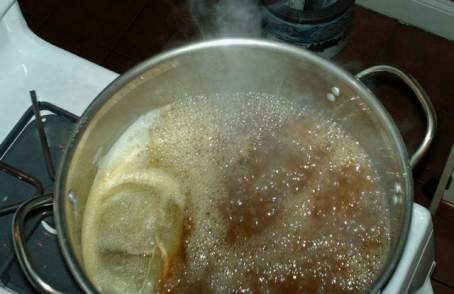
It’s 12:05 am, and I’m waiting for wort to finish boiling. It will be done at 12:10, and then a few minutes to cool it, pitch the yeas, put it in the basement, and head to bed myself.
Got the broken tap out quite easily at work this morning. Used two small allen wrenches shoved in between the flutes on the tap and turned it with a vice grips clamped “vertically” on the allen wrenches. Made a drive stud out of a 3/8 bolt later on and success is mine! Drove it with the drill tonight to grind 9 pounds of malt in a very few minutes! I was worried it might have ground too fine, but had no problems with the mash sticking so I guess all is well. I think I got good efficeintcy too…preboil gravity was 1.040. It will be interesting to see what it is after boiling off about a gallon of wort.
Well, never let it be said that I don’t multitask… I’m using the water that’s going through the immersion cooler to water the front lawn and flowers! It’s no longer hot, and I need to water out there so why not?
No pictures tonight…. next time!
Not the best of brew days!
Although I was still dragging butt from my day in the sun yesterday (had a fishing tournament) I decided this afternoon to finally assemble my 3-tier brewing sculpture (why do they call a sculpture? I like, and will use, the word structure MUCH better!) and make a batch of pale ale. Should have stopped right there!
Got the pieces of the structure from behind the garage, found a drill and a bit, and proceeded to attempt to drill holes for the bolts to hold this thing together. Promptly dulled two bits to be unusable, and didn’t have one hole drilled yet! Plan B… tripp to the hardware store, where I bought some hose clamps and clamped it together with them. I actually like it better…I could disassemble the whole thing in a couple of minutes if I wanted to!
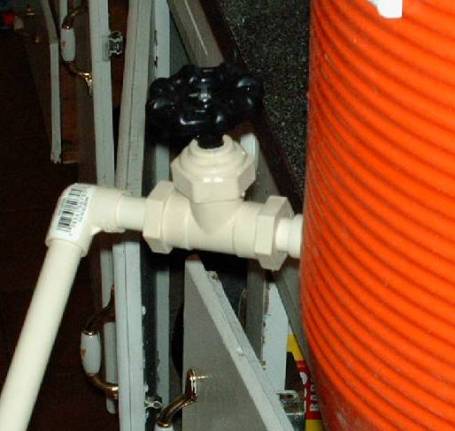
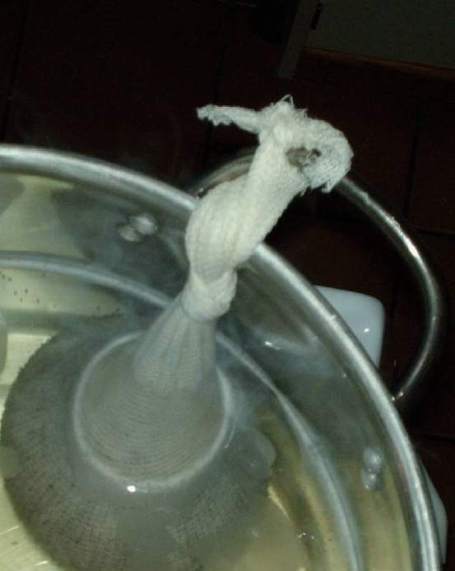
Last week I made my HLT (hot liquid tank) but used brass fittings, which can have surface lead on them. I knew from internet searches how to make the solution to remove this lead, so I made 3 pints of the solution and soaked the brass parts in it. Didn’t know how long they should soak, so went for close to an hour…and by then I had discovered that the proper time is 10 minutes…
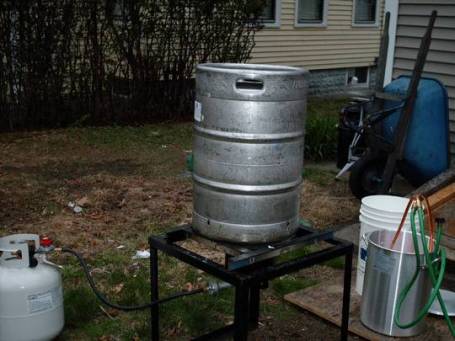
Got everything together.. it looks like this…
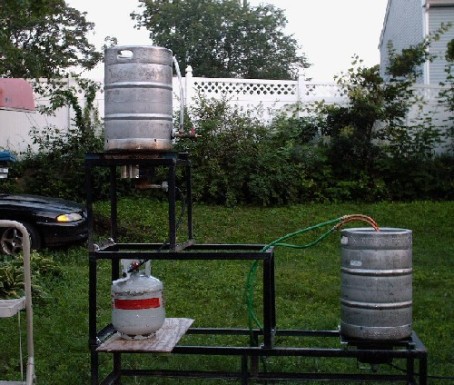
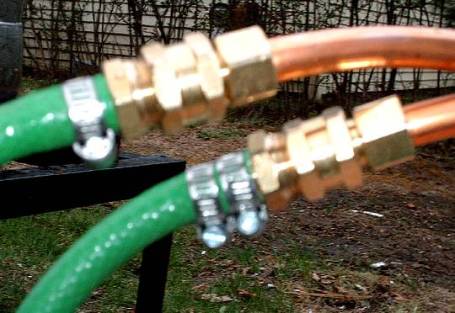
The second tier is for the mash/lauter tun, which is not in this picture. It goes where the green hoses drape over the frame. Thos hoses go to the immersion chiller, which is being heated in a white vinegar/water solution to clean it. Probabaly didn’t need to do it, but I haven’t used it in a month or so and thought it couldn’t hurt to clean it up.
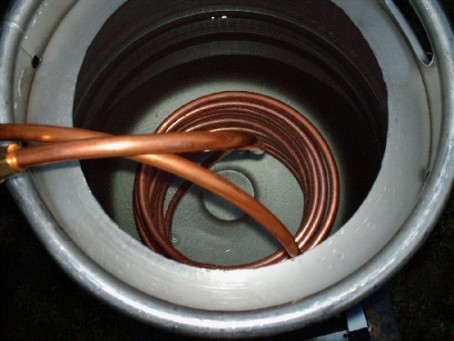
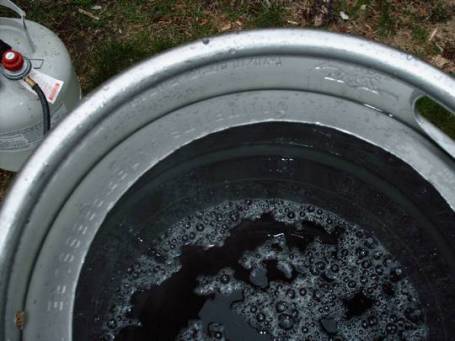
Notice how shiny it is… the vinegar removes any corrosion on the copper and makes it look brand new. Also, the hole in the top of the keg was cut with a cutoff wheel to a line made with a marker on a string pivoting around the center post of the keg, before it was cut out. It is sized to fit the lid from my turkey fryer pot.
Ok, water heaing in the HLT, cooler cleaning in the brew pot. Both burners blasting away…time to grind the grain.
I bought a used PhilMill to grind my grain last week… $40 and in pretty good shape. It comes with a ahndcrank, but can be powered by a drill. I started off with the crank, but after only about 1/2 pound decided that I needed to power this thing. I looked in the garage for a 3/8×16 stud so that I could thread it in the end of the roller, chuck it in the drill and grind away. I did not find a stud, but did find a 3/8 tap. These are hard and brittle… and I knew better, but I decided to use it to connect the drill to the roller….here’s the results of that foolishness..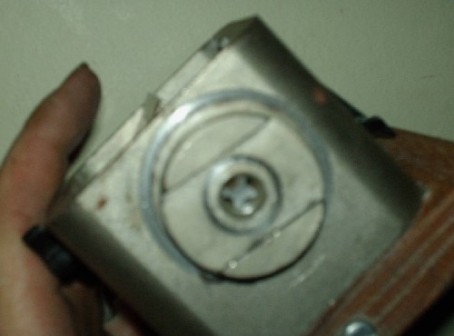
See the little X shaped piece in the center of the roller? That’s a broken tap. Tomorrow I’ll have to figure out how to remove it. Hopefully I’ll get it done, and can continue this brew day saga then.
2nd All grain
Anissa (daughter) and my wife decided I had hinted about needing a bag of grain long enough and so today presented me with a one-day-early father’s day gift of 50 pounds of american 2-row malt. One thing led to another at that point, and at 6:0 pm I started my second ever AG batch.
The target style is an American Pale Ale. I used 10 pounds of 2-row pale malt, and one pound of CaraPils. My hop schedule was 1.0 oz Chinook (11% aa) for 30 minutes, 1.0 Cascade (6%) for 20 minutes, and .5 ounces Cascade for 15 minutes.
I redrilled my mash tun manifold this am, and what a difference! Collected 8 gallons of wort in less thn 15 minutes! Had a bit too much wort for that matter.
Ran out of propane , it rained. Ahh, the trials & tribulations!
More later!
First all grain!!!!!!!!
 This is a bg step for a homebrewer…and I jumped into it today in my typical imaptient half-assed manner…but, it's on the burner as I type.
Here's some process pictures, and comments.
First picture is of the CPVC manifold I made this morning to go into my 5 gallon rubbermaid cooler I got for $4 at a yardsale
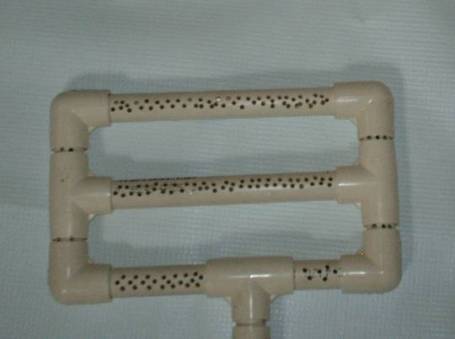
Not sure it's big enough, I got a pretty slow drain, the next picture is the manifold installed, and the second is the best the flow got. Actually, it started this way and never got any better, or any slower. Took maybe 2.5 hours to get 6.5 gallons of wort.
The stream was about pencil lead size.
Here's what 12.5 pounds of grain looks like after it's in 4 gallons of hot water.
Part of the reason for the slow drain may have been my valve, but I don't think so really
The coolest thing today is my brand new wort chiller! I made it from 50 feet of 1/2" od copper tubing and some fittings. I think it was about $52 total… my most expensive beer-making tool so far!
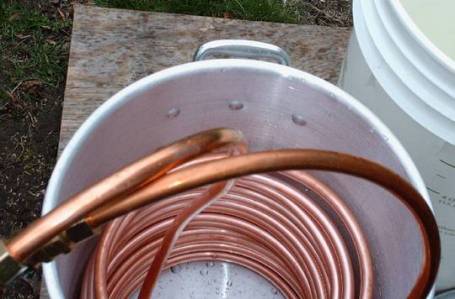
It's shown here after a white vinegar and water soak…at about 175 degrees. Here's the connection to the hoses.
Incidently… it's raining out,and I'm running back and forth between the brewing and the blogging! The boil is done… the wort chiller is doing it's job as I type…and has brought the temperature down to about 100 degrees in 5-6 minutes!
Here the brew is getting ready to start the boil
Here's the brew setup…sort of. The burner I'm using is actually the top stage of my three teir, but as the keggles don't have plumbing yet I didn't figure I needed the whole setup.
And, the last picture (for now) my temporary rain roof…slanted to allow any condensed liquids to drain away from the boiling wort.
So, not counting cleanup, or getting it into the fermenter (pretty simple to do that part!) it was an all day project, including making a mash tun and a wort chiller…I'm happy with that!
As this one is for the day we move my daughter & her husband into their new condo it's… New House IPA
Newest batch
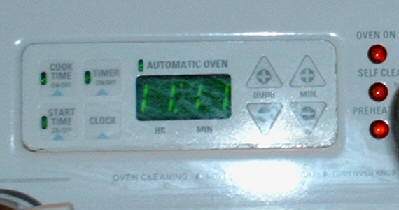
I intended to brew this batch a week ago last Saturday, but finally got around to it Weds. night. Notice the clock in the first picture..
Heck of a time to start brewing on a weeknight!
This is an extract recipe with grain, so I start by steeping the grain in 155 degree water for 20 minutes

The bag is tied to the pot handle so as to suspend the grains in the warm water.
After the grains are steeped te next step is to bring the water to a boil. It is then removed from the heat and the grain extracts are added and stirred well. The extracts used in this recipe are extra light pale extract, with rice syrup and corn sugar added also to provide more fermentables, but keep the color light and the body thin. When everything is dissolved and well stirred the heat is turned back on and the wort boil starts. It boils for 60 minutes, and the time starts when the boil does. The first hops are added at this time also. These hops provide bittering. I put the hop pellets in a bag and tossed it in the pot. This is the first time I have done this. I hope it will make for a clearer brew.
You can see the bag on the left side of the picture. It did eventually sink and rolled around a lot during the boil.
With 15 minutes to go I added the flavoring and aroma hops, and 2 teaspoons of Irish Moss, which is really seaweed, and helps to settle things in the beer and make it clearer.
Note the time the boil was actually started! One hour of boiling to go and then there’s still cooling the wort and the UGH cleanup. Gotta start this earlier next time!
Here’s the wort, cooled to 77.7 degrees and ready for the yeast. I forgot to take the yeast packet out of the fridge earlier, so while it warmed to room temp I did the cleanup and putting stuff away part of brewing, which is my least favorite part!
The brew now sits in the chest freezer-fermentation chamber, the first time I’ve used it. I can’t wait to see how a constant temperature will affect this batch. But, wait I must! The brew will be in the primary until MOnday of Tuesday night probably, perhaps it will stay there a full week, and then move to the secondary fermentaion. This gets it off the thick yeast cake that develops during the primary and allows it to ferment more for a couple of weeks without the possibility of getting any off flavord from sitiing on the yeast cake too long. After the secondary it will got to the bottles, still in the fermentation chamber, for 2 more weeks whicle it carbonates, and then finally a day or two after that it’s drink up time!
